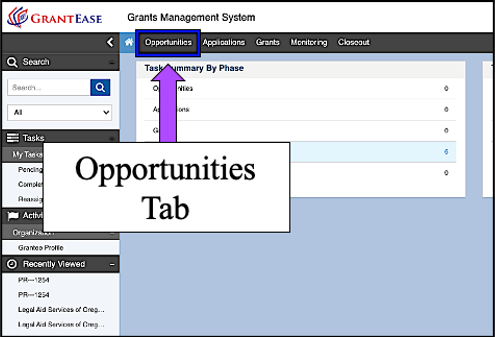
To begin the Pre-Application, users will select the Opportunities tab, which can be found in the Second Tier Toolbar.

Figure 1: Image of Navigating to the Opportunities Tab from the Home Screen
PLEASE NOTE: Only those service areas in competition this year need to fill out the Pre-Application. Those in renewal status should disregard the Pre-Application.
Opportunities Tab
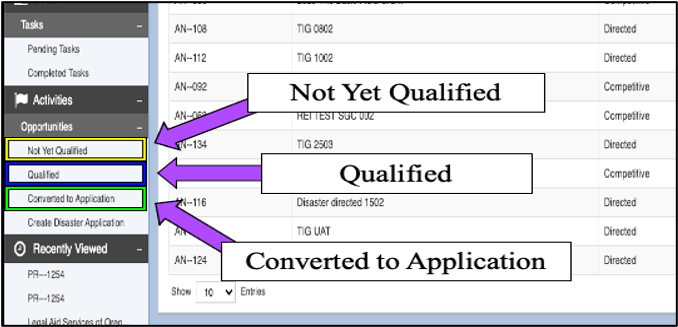
Once in the opportunities tab, users will see three options appear on the Left-Hand Sidebar: Not Yet Qualified, Qualified, and Converted to Application.

Figure 2: Image of the Opportunities Tab Options on the Left-Hand Sidebar
To locate the Basic Field Grant Pre-Application, users will select not yet qualified.
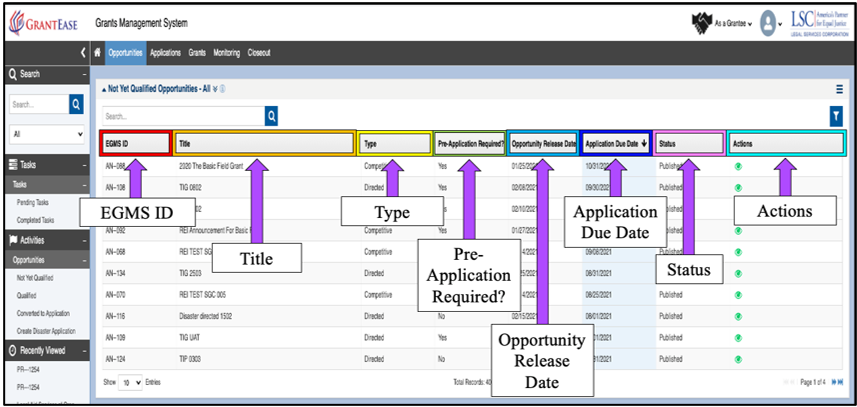
Users will then be taken to a new screen where they are able to view new opportunities. Each opportunity is organized into the following columns:
- EGMS ID for the system
- Title of the Announcement
- Type of Announcement
- Pre-Application Requirements
- Opportunity Release Date (when the opportunity was deployed)
- Application Due Date (when the application is due)
- Action (which allows users to view the current opportunity)

Figure 3: Image of the Column Headers for the Opportunities Table
To view an opportunity, users will select the green eyeball icon to proceed.

Figure 4: Image of the View Icon for an Opportunity
